Showing posts with label tutorials. Show all posts

Aug 22, 2012

How To: Remove Gel Manicures

Oh how we love gel (or shellac) manicures! They're chip-resistant! They dry instantaneously so no more waiting 20 minutes to pay for the manicure! And they look so good all the time. But I hate going back to the nail salon to get them removed (unless I'm getting another one done), so I stole their methods and have been doing this at home ever since.

What You'll Need:
+ Typical kitchen foil
+ Scissors
+ Cotton balls
+ Acetone nail polish remover
+ Cuticle tool
+ Buffer file
This is a 3-week old gel manicure, you can tell because it's starting to crack and my nails have grown out (well, in-person at least...in this photo they don't look too bad):

Step 1: Cut the foil into 10 pieces and set aside 10 cotton balls. I usually just split 1 cotton ball in half for two nails.
Step 2: Soak each cotton ball with acetone nail polish remover.
Step 3: Using the foil, secure each fingernail with the acetone cotton ball facing your nail.
Step 4: Leave for 5-7 minutes.
Step 5: Using your cuticle tool, gently scrape off the nail polish, going away from your hand. It should be relatively easy - if it's still too difficult and isn't peeling off, then reapply the soaked cotton ball and foil and wait a few minutes.
Step 6: Repeat for the rest of the hand and switch over to the next hand. Your nails may still have some nail polish on it as well be uneven, but that's okay.
Step 7: With a buffer, simply buff your nails out until smooth and even. Use more acetone to remove any excess nail polish as needed.
By the time I'm done with using cuticle oil and prepping my nails, they're ready to go with a basecoat and color!

questions? ask here! | twitter tracker

Aug 15, 2012

Easy Glaze Chicken

Found this on Pinterest! SUPER easy and super delish!

+ 4 pieces of chicken (I used skin-on, bone-in thighs)
+ 4 cloves of garlic (I used 4 tsp of chopped garlic because I'm lazy and don't want my hands to smell)
+ 4 tbsp of brown sugar
+ 3 tsp of olive oil
+ salt
+ pepper

> Pre-heat the oven to 500-degrees, spray non-stick spray onto a casserole/baking dish.
> Saute the garlic in the olive oil until soft (be careful not to burn!)
> Remove from heat and add brown sugar, mix
> Put chicken in the prepped casserole/baking dish
> Coat the chicken with the brown sugar mix (since I had skin-on thighs, I put some of the mix in between the meat and skin)
> Season with salt and pepper
> Bake 15-30 minutes

it might be a little TOO brown, but I liked the crispy skin! (guilty!)

I served this with a quick whole-grain couscous salad (couscous, chopped cucumber, and chopped tomatoes, salt & pepper). I added a tbsp of low-fat balsamic vinaigrette for some more flavor.
Ryan totally ordered pizza for dinner tonight, but I stuck to my guns and ate this healthier choice instead. Stupid MyFitnessPal!!

Only eating 1 piece of chicken and about 1/2 cup of the couscous salad, it was a 300 calorie dinner. NOT BAD!

Apr 17, 2012

How To: Wrap Around Bun

Seen here & here, I am in love with this easy-to-do wrap around bun.  It literally will take you less than 5 minutes to do and it looks more put together than the usual "I just got out of yoga class bun."  Which is me knotting my hair all sorts of crazy and passing it off as an actual hairstyle.

I usually start with Day 2 hair just because updos (even simple ponytails) are easier when your hair is a little dirty.  Sorry for the little spots on the photos, either I need to clean my lens or a ghost kept photobombing me.

What you'll need:
+ 1 hair tie (elastic band)
+ 3-4 bobby pins
+ Any hair bow or hair accessory

Step 1: Start with unwashed hair.
Step 2: Pull back hair into a ponytail.
Step 3: Loop your hair through the ponytail holder twice; when going to loop your hair the third time, stop about 1/3 of the way through to create a "loop."
Step 4: Split the ponytail section in half.
Step 5: Wrap the two ends over each other, criss-crossing over the top of the bun.
Step 6: If your hair is long enough, criss-cross the ends under the bun as well.
Step 7: Secure the crossed-over ends with bobby pins under the bun.
Step 8: Clip a bow or any hair accessory under the bun (I like to show off the top).
It's also cute to put a headband or decorative bobby pins.

Good luck!

questions? ask phivy! | twitter tracker

Apr 11, 2012

Slim Shady

I don't really think I have a FLAT nose...though when I was younger, I felt it was too big for my face, but I do think I grew into it.  Like how puppies grown into their paws and ears.  Case in point:
Now with the miracles of makeup, I thought I'd try slimming my nose to create a higher bridge and slimmer frame for my face all with shadowing and contouring.  I mean, it works wonders with Nicki Minaj and Kim Kardashian, I could TRY, right?

Now, I'm not saying I did a great job.  This is my first time after all, but I did want to post my experience about it and eventually, I'll hopefully get better at it.

P.S. I took these pictures without thinking I would post about contouring my nose, so forgive the wider-angled shots.  Just pay attention to my nose, lol.

I think the first thing you need is the proper color.  It's one thing to have a nice deep brown for your eyes, but when you start applying it on your actual FACE, it's a lot different.  You want the color to be subtle yet noticeable.  You want it to look like a natural shadow or contour, not dirty or misplaced bronzer.  So a flat, taupe might be the best bet.  I used a brown because taupe wasn't really showing up and bronzers typically have a shimmer or can be a little too red in tone.
Next, it's about application...I can't figure out where it should START and end...most beauty experts put start contouring right by the eyebrows...I feel like that is just SO high...but it does create depth and height, so what do I know.
I applied a brown shadow to the sides of my nose then carefully blended down.  I wanted to create a higher bridge but without making it look like I had received a black eye in the process.  It was a lot of smudging, blending, and adding a little more color:  I tried to narrow the "tip" of my nose but honestly gave up after it looked like I had a snout.
Lastly, I added a slight shimmer to the top of my nose; supposedly this highlight should add more height to the depth you've already created on the sides.  I think I did a pretty subtle job, but maybe I'll work on it for photographs...so that it will be a little more evident.
I'm still on the fence about it because I'm still practicing...I want to get better at it, but when I showed my sister her first comment was, "Oh THAT'S why you looked half-white." but then proceeded to comment, "Don't forget...less nose means MOAR face."  That's true.  I don't want to be so busy slimming my nose that all of a sudden my cheeks look humungous!  Then I'll send more time slimming those down too!

Oh to be a girl!!  Woe is me.

questions? ask phivy! | twitter tracker 

Feb 13, 2012

Bronze Panda

Tramanh and I have a running inside joke about how some makeup artists and celebrities OVER-wear bronze makeup and end up looking like bronze pandas.  Imagine just smudges of browns, bronzes, and coppers all over and under their eyes, plus bronzer on their cheeks. I thought, "There HAS to be a way for us to wear these colors without looking like a bronze panda."  I was also looking to do a "softer" look, normally my makeup can be pretty harsh (dark eyes, bright lips, plus cheeks), so in lieu of Valentine's Day, here's a softer version of the smokey eye.

And on a rarer note, this is one of the first makeup posts (in a long time) that I'm not wearing liquid eyeliner - I have to admit, it took some getting used to...it felt so...un-precise.

What I used:
+ NARS Mykono cream eyeshadow
+ MAC Mulch eyeshadow
+ MAC Glamour Check eyeshadow
+ MAC Honey Lust eyeshadow
+ Kat Von D black eyeliner
+ Stila Brushed Gold loose bronzer

Working with just bronze eyeshadows, I focused on gradiating the eyeshadow - from lightest to darkest starting from the inner eyelids to outer.
+ With your ring finger, apply NARS Mykono eyeshadow to the crease of your eye, it won't be too obvious, since the pigment isn't very much, but it does create a nice base for your eyeshadows:
+ Next, apply MAC's Mulch over the same area:

+ With MAC's Glamour Check, apply the darker brown to your outer edges, along your crease, and against your lashline - it should create a "V" on your outer corners:
+ Honey Lust is a VERY shimmery (almost glittery) gold eyeshadow, so be careful when applying because it tends to fall on your cheeks and everywhere else.  Apply to your inner corners of your eyes but make sure to PAT down, versus sweep as the eyeshadow is pretty messy.  I'm pretty comfortable with extending the inner-corner eyeshadow high, because I think it makes my eyes look bigger but I know that some girls prefer to "color in the lines," so do what's comfortable for you:
+ Using a thin, straight eyeshadow brush, apply Glamour Check to your lower lashline:
+ To keep this look softer, I opted for pencil liner instead of liquid liner and I think it makes a pretty big difference, especially if you smudge it a little with a stiff angled brush:
+ I skipped out on mascara, though if I was going out somewhere nice, I definitely would have applied 2-3 coats:
+ Applying a light layer of bronze (to not over do it), the Stila bronzer is great - although it's loose, it's still really pigmented so a little goes a long way:

Finished!
 twitter tracker | questions? ask here!

Oct 17, 2011

Step 1: You Put a Cake in the Jar

So it was my sister's birthday last weekend and aside from getting her the Game of Thrones bookset, I wanted to add something special.  Since I wasn't able to celebrate her birthday with her in-person (and enjoy dericious cake), my friend (who's sister's birthday was the day before Christine's) and I decided to bake our sisters a cake...in a jar!

My friend got the idea from here, and it looked so cute and so simple to do.  Except here's the thing: the entire CITY OF LOS ANGELES was out of mason jars!  Home Depot, Target, Michael's!  It took us 3 days to find mason jars and even when we DID, they were 1/2 gallon each, NOT the cute little quart ones you use for jams.  At that point, we were like, SCREW IT.

Here is our step-by-step process, it actually turned out pretty good...though I have no idea if it made it safely to Ohio.  I'm pretty sure it's going to look like throw-up by the time it gets to her doorstep.  Oh well, at least I tried!

We baked yellow cake and added sprinkles in it to make confetti cake, since my friend isn't a fan of white cake (which is normally what confetti cake is made out).

What you'll need:
  • Cake mix (confetti cake mix or yellow cake mix and separate sprinkles)
  • Mason jars
  • Vanilla frosting
  • Food coloring
  • Sprinkles
  • Candles

Sep 6, 2011

How To: Trimming Yo Bangs

Tramanh & I love getting questions that we can do video responses to...it makes things much more interesting!  So when I was asked how I trimmed my bangs, I thought that was a great video tutorial.  Except...I kept missing the camera while I was actually doing the camera (see what happens when you rely on a tripod?!).  Anyway!  I hope this helps viewers know how I usually trim my bangs for a side-swept look.

Aug 29, 2011

Top 10 Wardrobe Essentials

Tramanh &I were recently asked on AskPhivy what our top 10 wardrobe essential items that we thought every girl should own.  So instead of writing a list & linking each item, we decided to take it one step further & do a VIDEO REPLY.

You guys may have noticed in my past videos, I never talk (TOO MUCH NERVOUS), but we thought it would be fun (yet incredibly nerve-wracking) to actually talk.  So, if you have a few moments, take a look &let us know if you like them!


questions? ask here! | twitter tracker

Mar 31, 2011

How To: OPI Shatter

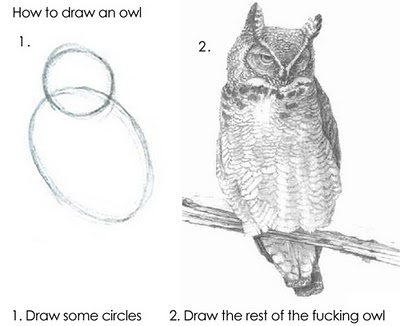
I do love doing tutorials (or how-to's); whether they're picture-based or a video, I always find a step-by-step process easier to follow than a shot of the finished product.  But for this particular tutorial, I literally felt I was doing this:
I decided to use a bright yellow for the increased contrast (though I wanted to do a teal...maybe next week!).  Look how cute this Bonita nail enamel is - it's a mini nail polish!  I got it from Francesca's Collections awhile ago & like eyeshadow palettes, I really like these small nail polish bottles for colors that I wouldn't wear often (or that could be trendy).  Why spend a good amount of money on a full bottle of nail polish when the color is seasonal & you'll only end up using like half of the bottle before it gets gooey?

Everyone knows how to paint their nails...but I got so many nice compliments on my nails in my this post, I thought it'd be cool to show the process of OPI's Shatter.  This definitely seems overly obvious, but enjoy anyway!

What you'll need:
+ a base coat {seche clear}
+ a base color {bonita nail enamel in yellow}
+ OPI Shatter
+ a top coat {sally hansen dry instantly}

+ Start with clean nails - I have the worst cuticles, so I use Sally Hansen's Instant Cuticle Remover to help push them down & cut them (I KNOW it's not good for you to cut your cuticles...I can't help it!)
+ Apply a base coat - I never used to use a base coat before but I really notice the difference in the color application by using it - it also has allowed the color to stay on longer.

+ Apply two (2) coats of a base color
 + The trick is to allow the base coat to completely dry before applying Shatter
+ Then apply one coat of Shatter - it should be relatively thick to cover the nail in a couple of strokes.
+ Be warned: this stuff dries fast!  Apply a single black layer & within seconds it starts to dry & crack.  To give you a sense of how quick it dries, by the time I finished painting my ring finger, my pinky finger was already dry.
+ Allow a few minutes to dry (doesn't take very long)
+ Apply a top coat
And you're done! Oh! To clean up any mistakes, I simply dip an old concealer brush into some acetone and brush along the sides.  Very easy & super effective - much better than using a q-tip that can leave cotton strands behind.

Now draw the rest of that fucking owl.

Mar 22, 2011

Hot Lips {& Shabby Apple Winner!}

So while at SXSW, my good friend & coworker, Sarah, asked me how I apply my red lipstick.  And I was like, "Durr, there are like 100 tutorials out there...why are you asking wittle ol me?" but then I realized that she's not scouring the interwebz & magazines like I am to figure out how to apply red lipstick; so I thought it would be great to post my personal steps to achieve long-lasting red lips.

Of course, just like with anything, everyone has their own go-to methods, but this seems to work for me - having a base, blotting & reapplying ensures that my lips are still intact while I eat...though I wouldn't recommend eating a burger or something where it could potentially get on the sides of your face.  NO it's never happened to me (yes it has).

Also!  I would like to say that the movies are LIARS & if you DO start making out with your bf while wearing red lips...unless it's a lipstain that does NOT move (even as you scrub your lips with every makeup remover possible), both you AND him will end up looking like...well...this.

How To: Long-Lasting Red Lips from hoisinivy on Vimeo.

What you need:
+ Foundation / Concealer (I used L'Oreal MagicSmooth Souffle in Buff Beige)
+ Loose powder (I used Physicians Formula Mineral Loose Powder in Translucent Medium)
+ Nude lipliner (I used Nars Lip Pencil in Tortola)
+ Red lipstick (I used Sephora Lipstick in Rouge R04)

Also, the winner of my Shabby Apple giveaway has been chosen!  W00t.  I've collected everyone's names, added those who were already followers (hey, I want to rewards those who have always been followers in addition to those who just started)...and the winner is...
....
Miss Kat from Dallas, TX!  So Kat, please email me {stephthuynh [at] gmail [dot] com} so I can collect your information (like blood type, social security number, and first born) & send along your fabulous Shabby Apple dress!

Thanks to everyone who entered - even those who didn't, I added you.  NO CHOICE.

questions? ask here / twitter tracker