Jul 31, 2009

For Your Viewing Pleasure...Food Porn!

Last night I had a good friend come over for some girl-on-girl time. Wait - that didn't sound right. I mean, last night I had a good friend come over for a girl's dinner...that sounds better.

I made an Anytime Vegetable Salad and Ga Ro Ti (Vietnamese Roasted Chicken) - these two really easy & simple recipes are great when hosting a friend or two for dinner. Although I will warn you that the chicken does require to be marinated for at least 24-hours, so prepare the night before.

Anytime Vegetable Salad
(adapted from Giada DeLaurentis)
INGREDIENTS - SALAD
- 2 cups shelled edamame (can buy them frozen)
- 8 oz thin green beans, trimmed
- 8 oz thin yellow wax beans (aka: yellow green beans), trimmed
- 1 1/2 cups cherry tomatoes, halved
*steph note: i couldn't find yellow wax beans for the life of me, so i just doubled-up on green beans
*steph note: also, i found it easier to eat if you halve the green beans, so you're not stuffing entire green beans in your mouth


INGREDIENTS - DRESSING
- 3 tablespoons extra virgin olive oil (EVOO)
- 1/3 cup red wine vinegar
- 2 tsp fresh basil, chopped
- 2 tsp fresh thyme, chopped
- 1 tsp salt
- 3/4 tsp ground black pepper

PREPARATION
Cook the edamame in a large pot of boiling water until crisp-tender, about 3 minutes. Drain. Rinse with cold water, then drain well and pat dry. Repeat with green beans (and yellow wax beans, if you can find them) - it's the same cooking time of 3-minutes, drain, and rinse with cold water to stop the cooking.


Add the vinegar, oil, herbs, salt, and pepper to a screw-top glass jar (or a dressing dispenser, if you have one), shake well.

When you're ready to serve, shake the jar again to re-mix the vinegarette and pour over the vegtetable salad. Season with more salt & pepper, if desired.
*steph note: OMGEE, how easy is this?!??!

Ga Ro Ti (Vietnamese Roasted Chicken)
(adapted from SundayNiteDinner)

INGREDIENTS
- 2 1/2 lbs chicken thighs
- 1 1/2 tsp granulated sugar
- 1/2 tsp ground black pepper
- 1 1/2 tablespoons soy sauce
- 1 1/2 tablespoons fish sauce
- 1 1/2 tablespoons canola oil or vegetable oil (plus some more for frying)
- 4-5 cloves of garlic
*steph note: chicken thighs with bone-in, skin-in is the best; the skin adds the crispiness when frying
*steph note: i LOVE garlic, so i add a little more. GARLIC GARLIC GARLIC!!!


PREPARATION
Trim excess skin and visible fat from chicken thighs with kitchen shears, set aside.

In a medium bowl, whisk together sugar, pepper, soy sauce, fish sauce, and oil until well-combined. Stir in garlic. Add the chicken thighs and evenly distribute the marinade between thighs. For extra flavor, stuff a little garlic and marinade under the skin. Cover and let marinade for up to 24-hours in the fridge.
*steph note: it is MANDATORY for you to add more marinade and garlic under the skin, no ifs, ands, or buts.

Adjust oven rack to middle position; heat to 350-degrees F. Heat 1/2 tbs of canola/vegetable oil in a large, nonstick, oven-safe skillet over medium-high heat. Add the chicken to the skillet, skin-side down, reduce heat to medium and fry until skin is golden brown, about 6-8 minutes.
*steph note: pay attention to your chicken or else this happens:

i accidentally left it on medium-high and on for too long, make sure to check it every 3 minutes to see the coloration

Flip chicken and brown other side 2-3 minutes; set chicken aside. Don't overcrowd the chicken, work in batches if necessary
*steph note: i do about 3 thighs per batch; this is how it should look:

Drain rendered fat and remove any burnt garlic, leaving a thin film of oil in the skillet. Return all the chicken to the skillet and roast for 30-40 minutes. To check doneness, poke chicken with a knife to see if the juices run clear. You could also check by temperate if you had a thermometer: bone-in = 170-degrees internal temp; bone-out = 165-F internal temp.
I may or may not have forgotten to take a picture of the finished product, but just see the picture with the gold star next to it - that's what it should look like, but cooked. Ha. Hey, I'm new to this "food porn" industry, I'll have better pictures as I go on.

I served it with plain white rice & some chopped green scallions. That's all!

Good luck & Enjoy!!


P.S. If you have any "MUST-DO" recipes, feel free to leave them in the comments section or email me directly at: steph.t.huynh@gmail.com...of course you would get full credit!

P.P.S. That goes for make-up too - any ideas, suggestions, etc. would be greatly appreciated!

Jul 30, 2009

Silverlight

Alright, I may have found a silver shadow that doesn't turn ashy gray on me!!

Silver Fog by MAC is a loose shadow that is borderline shimmer...ALMOST glitterly. But the high pigments allow the color to sit well and not turn into this gross mosh of a gray.
This look is accomplished by concentrating the silver in the center of your eyes - I know it's natural to want to put it in the inner corners, but for a brighter-eyed look that isn't so in-yo-face, this can work. I also applied it on the lower inner corners of my eyes, how weird would it look if I applied it in the center as well?

whoa, pictures of just my eyes are weirding me out! it's like i'm looking into your soul. YOUR SOUL IS MINE.

Surround the silver with a dark brown or black and lightly blend. Make sure not to over-blend!

For a quick and dirty way to get your stupid grown-out bangs out of your face, literally twist your bangs back, gathering more hair as your descend down. Pull back in a messy bun for the "I know my hair sucks today but really, who are you to judge me?" look.


this pictures makes me look like i have a protruding vain in my head. haha.

Making dinner tonight for a friend of mine & me...stay tuned for recipes & food porn!

Jul 29, 2009

Deep Blue Sea

So blue is a tricky color in general...unless you like this look. But I find it to be even more true if you're trying to rock blue at work AND if you're Asian. You've seen those lovely Asians (ahem FOBS) who wear the light and bright blues, and all you think is, "oh girl...oh honey, no no no...oh wow, no, what? why? did you see yourself? no! NO!!!!" and then you repeatedly hit your head against a wall. No? Just me? You feel me though, right?


Vy from Cest Lavy was kind enough to send over several MAC pigments that were overflowing her counters, and I was more than happy to take some make up off her hands. This inspired me to incorporate a little more color to my eyeshadows, and since I'm boring and wore a blue polo to work, might as well have fun with the shadows!


Step 1: Prep your face - concealer, powder, etc.

i always blow out my checks and hold my breath while powdering my face. sexay!

Step 2: Apply a cream shadow all over eyelids

using MAC's Pearl cream shadow

Step 3: Apply a dark brown eyeshadow over the bottom of your upper lids and extend up to a V-shape halfway on your crease
using the brown from Loreal's HiP dual eyeshadow in Braze

Step 4: BLEND (up & out)
blended with a fluffy eyeshadow brush and used MAC's Era - whatta difference blending makes!

Step 5: Create emphasis with black shadow along the outer corners & crease
using MAC's Carbon

Step 6: Lightly apply a deep blue shadow to the outer corners (loose eyeshadow may work best to avoid over-powering)
using MAC's loose pigment in Bell Bottom Blue

Step 7: Curl your eyelashes
using Shu Uemera eyelash curler - a must have!

Step 8: Line upper & lower lids with black liquid liner
(go about halfway on your lower lashline) and line your lower waterline with a white liner, mascara. Take an angled brush and apply the blue shadow on your lower lids, below the black liner.

using NYC's liquid liner in black and Nars' white pencil

Step 9: Blush

using Nars Silvana (where I suck my cheeks in) and Nars Angelika on my cheek bones


Step 10: Realize that the lighting sucks indoors and resort to taking pictures in your car on the way to work.
the scar on my arm is from burning myself while ironing, although it looks scarier than it really is.
Good luck! Or should I say: guck luck!
image source: cakewrecks.blogspot.com


Jul 28, 2009

My Cherry Amore

Tee hee, I crack myself up.

Btw, I wrote this post and due to some technical difficulties, it wouldn't post! Bah humbug!

Cherries are definitely in season, as seen by their remarkable prices - what was once $4.99/lb is now less than $4 per bag, with each bag at least 2lbs! Therefore, I highly recommend everyone stocking up on it! Which is what Rye Bread's parents did...then they left for Europe...and Ryan doesn't eat cherries, and last I checked, I can't feed 'em to the dogs, so what to do?

Cherry Pie? Sure, that sounds summery and traditional...a summer tradition, if you will.

Cherry-Oatmeal Cookies? But I just made oatmeal raisin cookies last week.

Cherry Crumb Cake? Say what?!

hand-pitted cherries

After spending a few minutes googling "cherry recipes" I stumbled upon this one, which I can't remember where - but as soon as I back-track, will give credit to. Here's the recipe for a nommy cherry crumb cake, enjoy!

INGREDIENTS - CAKE
- 6 tablespoons unsalted butter, room temperature
- 3/4 cup granulated sugar
- 2 large eggs
- 1 1/2 tsp vanilla extract
- 1/2 tsp almond extract
- 3/4 cup sour cream
- 1 1/2 cups all-purpose flour
- 1 tsp baking powder
- 1/4 tsp baking soda
- 1/2 tsp salt
-1 cup coarsely chopped pitted fresh cherries, tossed with 2 tablespoons flour*
*steph note: the best $13 spent is on an olive/cherry pitter. it only took 6 minutes to pit an entire bowl of cherries...definitely worth it, especially for the summer, seen here -->

INGREDIENTS - TOPPING
- 6 tablespoons unsalted butter, room temperature
- 1/4 cup packed brown sugar
- 1/4 cup granulated sugar
- 3/4 cup all-purpose flour
- 1 tsp ground cinnamon
- 1/4 tsp ground nutmeg
- 1/8 tsp salt
1/2 cup chopped pecans or walnuts

PREPARATION
- Heat oven to 350-degrees F. Grease & flour a 9-inch round cake pan

- With an electric mixer, cream 6 tablespoons of butter and 3/4 cup granulated sugar until light & fluffy. Slowly beat in the eggs, one at a time, beating well after each addition. Beat in the vanilla extract, almond extract, and sour cream until blended.
*steph note: i accidentally put an entire stick of butter instead of the recommended 6 tablespoons and had to start all over again, so make sure to cut the butter sticks before leaving them at room temp...i am just an idiot.

not required: looking like an idiot while ryan tests the camera // taking psycheledic pictures because you fall while trying to take a picture

- In another bowl, combine 1 1/2 cups flour, baking powder, baking soda, 1/2 teaspoon of salt. Slowly beat the flour mixer into the batter just until blended. Fold in cherries. Spoon into the prepared baking pan.


- Combine 6 tabelspoons of butter with brown sugar, granulated sugar, flour, cinnamon, nutmeg, salt, and pecans/walnuts. Mix well. With fingers, crumble the streusel mixture eveninly over the cake batter.
*steph note: i accidentally put an entire stick of butter instead of the recommended 6 tablespoons and had to start all over again, so make sure to cut the butter sticks before leaving them at room temp...i am just an idiot. Yes....AGAIN. Don't you judge me!

how come when ryan saw this picture, he asked "what is this? oh, i thought it was dog food." WTH!

- Bake the cake for 45 to 50-minutes, or until a toothpick or cake tester inserted into the center of the cake comes out clean.
- Serves 8 to 10.
*steph note: Or 4 hungry hungry hipppos.


After taste-testing this, it seemed a little dry. More likely because I was over-zealous with my mixer and over-beat (over beated? over bat?) the batter. Make sure to just mix until its blended.

Bon appetit!

so i was also multi-tasking by doing laundry, don't mind the mess! // ryan was helping...by playing with our xbox360.

p.s. can we please give me a pat on the back for not making ONE SINGLE "cherry poppin'" joke?! lol.

Jul 24, 2009

Photo Story: Pass It On!

The Beauty File was gracious enough to tag me in a little game called Photo Story, in which you must:
* Open my first photo folder
* Scroll down to the 10th photo
* Post that photo and story on my blog
* Tag five {or more} friends to do the same

And since my camera ran away from home, this is the perfect opportunity for this!!

I know what you're thinking: "...the hell is going on here?!" The story behind this is quite simple: I was in Vegas for my 26th birthday and I had just finished changing, so I was putting my lounge-y clothes away and my friend was testing out the lighting in the room. Notice what looks like granny panties are actually nude pantyhose. I debated between the black pantyhose I was wearing and the nude version; the nude version ended up NOT being nude at all and was actually cream, which ended up looking horrific.

So that's the story! Sorry it wasn't that interesting, but it is what it is.

Btw, I tag ALL of you who want to play. I'd love to see your photos & back stories.

Jul 23, 2009

Lost Camera + Apology

So I went out last night and totally lost my camera.

That's what happens when you drink shots in the double-digit range. TRUST ME, I'm paying for it now...especially since I threw up at work. Way to stay classy. So now I have to go figure out where the hell the camera is.

ALSO, apologies for the non-pc reference of "Filipino slut." To make a long story short, somebody commented on Phi-Style's blog saying she looked like a "typical cheap Filipino slut" which we ALL found hilarious because 1. What's a "typical cheap Filipino slut"? and 2. She's not Filipino and 3. She's neither cheap nor slutty. Her clothes and make-up are quite expensive in fact. As she mentioned in her comment (see my previous post), the more accurate term would be "Vietnamese slut." And since she reminded me of this incident, I just took it one-step further to mention it on mine...because of the randomness & hilarity. But to be clear! Filipinos are not cheap or slutty! They are upstanding citizens and I should know, I'm dating one!

And it WAS a harmless joke, but I apologize if I offended ANYONE of any race or sluttiness. Honestly, I figured since I linked the joke, you guys would read the post about it...but if I was unclear and offended Filipinos, I do sincerely apologize. I kinda also figured you guys understood my sense of humor (or lack there of apparently!)

And I AM Vietnamese, but not a slut.

And since we're on the topic:

Jul 22, 2009

My Goodies, My Goodies, Not My Goodies

My fellow Vietnamese, but looks "Filipino Slut", Phi-Style, listed out her current make-up goodies, which made me think, I always generalize what I use (e.g. use a brown eyeshadow and liquid liner) and let's be real, that doesn't help anyone! Since I change my make-up day-to-day and it would be nearly impossible to list everything I use, I decided to list my staples - things I use everyday, all day. As you'll see, I mix in brands, from department store brands to drug store brands. I'd like to consider myself as an equal opportunist. I always love seeing everyone's make-up bag, drawer, case, satchel, whatever you carry your make-up in. If you have any reviews or recommendations, please leave a comment!

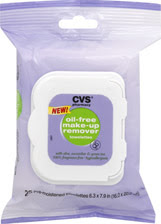
Facial Cleansers: Dr. Wexler Exfoliating Cleanser // CVS Oil-Free Make Up Remover

alright, let's be real, i LOVE CVS. i mean, i spend a lot of time & money there. and they have the BEST generic products, from make-up removers to toners to body wash, i see no difference in the generic CVS brand and their costly counterparts (i'm talking about you neutrogena!) dr. wexler products are great for acne and anti-aging - it's better to prevent than treat and a lot of her lines carry treatment for both and can be found at your local Bath & Body Works.

Moisturizers: Murad Oil Control Mattier w/SPF 15

this moisturizer is a lifesaver. i have VERY oily skin, i'm talking by the time i put on my make-up and leave my house, i need to use an oil blotter sheet. i know, i'm so attractive, especially because i leave the used oil sheets in my car and am always embarrassed when guests ride with me. (i shove them in my glove compartment) nothing is sexier than seeing a woman's face grease! this moisturizer (with SPF so i know it's good for me) can be found online at murad's site or even at certain Bath & Body Works.

Concealers: Kat Von D Tattoo Concealer (Medium) // MAC Select Cover Up (NC30) // Sephora Concealer Palette
since i have discoloration on my chin (gotta love acne scars, w00t teenage acne!), i use a mixture of 50/50 kat von d's tattoo concealer, which is quite heavy, with mac's select coverage that is lighter in consistency. i love sephora's concealer quad for spots and under-eye coverage (using the salmon for under-eye bags). kat von d & sephora can be found at...sephora (shocker) and mac can be found at...mac stores and nordstrom.

Powder: MAC Studio Fix Pressed Powder (NC35) //
Sonia Kashuk Barely There Loose Powder (Flesh)

i've been using MAC's studio fix for the past...i don't know, 10 years? so i'm an absolutely loyalist, but because it's been so hot as of late, i've been exploring with loose powders to avoid looking overly made-up and cakey. enter sonia kashuk's barely there loose powder. if you're not looking for heavy (or really ANY) coverage, this is perfect for setting foundations/concealers, and at $9 a pop, can't really go wrong. sonia kashuk can be found at your local targets! w00t tar-jay. btw, use the MAC pressed powder with a round brush, don't use the sponge applicator unless you're looking for FULL (e.g. cakey) coverage.

Eyes: NYC Liquid Liner (Jet Black) // MAC Eye Shadow (Era) - not shown -//Maybelline Lash Stylist (Black) // Shu Uemera Eyelash Curler
the four things i need in order to look halfway decent include liquid liner, a taupe eyeshadow to sweep across my lids, an eyelash curler and mascara. being asian, it's almost a necessity to curl my eyelashes and maybelline's lash stylist is perfect for being light-weight comb that is able to find the little lashes that i have. of course you guys have seen how obsessed i am with liquid liner, and surprisingly, NYC holds up with the rest of them, and at $2 a pop, if you hate it, you won't feel bad tossing it. however, i do warn that you should NOT layer the liquid liner OR mascara, as they will flake. you're better off taking it off with make-up remover first and starting over again if you want to touch up. p.s. the reason why Mac's Era isn't shown is because it would show up as a BLACK eye shadow when i publish...anyway, it's taupe!

Cheeks: Nars Blush (Silvana// Angelika // Taj Mahal)
i know, i know, everyone LOVES Nars' Orgasm or Deep Throat, i do too! in fact, i have both of them...but i can't help but love these three babies too. not at the same time though! i usually pair up Nars Silvana with one of the two more intense colors. using Silvana where my cheeks sink in when i suck 'em in, and highlighting my cheek bones with one of the two other blushes. the great thing about angelika and taj mahal is that you need VERY little as they're highly pigmented...which almost means if you use too much you could looking clownish.

Lips: Sonia Kashuk (Precious) // Co Bigelow Mentha Lip Gloss // Lip Smackers (Way-Out Watermelon)

i collect lip glosses, i mean entire CASES full of lip glosses. is there a lip gloss anonymous? but in the end i revert to the good 'ol stand-by's of co bigelow's mentha lip glosses (that not only never dry out your lips but also freshen your breath) and lip smackers lip gloss - seriously, how old am i? 12. perhaps, but it brings me back to my younger days of bliss, and with sparkles, it's great for summery fun. i just tried out sonia kashuk's lip glosses, and they're actually pretty good. sheer in color, it's perfect for a little tint.

I always love seeing everyone's make-up bag, drawer, case, satchel, whatever you carry your make-up in. If you have any reviews or recommendations, please leave a comment!